Bootstrap Tabs Set
Introduction
In some cases it's pretty effective if we can certainly simply put a few sections of info sharing the exact same place on web page so the visitor easily could browse throughout them with no actually leaving behind the display screen. This gets easily realized in the new 4th edition of the Bootstrap framework by using the .nav and .tab- * classes. With them you are able to simply build a tabbed panel together with a different kinds of the material stored in each and every tab permitting the site visitor to simply just check out the tab and have the chance to check out the desired web content. Let us have a better look and check out the way it's performed.
How to put into action the Bootstrap Tabs Form:
First of all for our tabbed section we'll require several tabs. In order to get one set up an <ul> element, appoint it the .nav and .nav-tabs classes and put several <li> elements inside carrying the .nav-item class. Inside of these types of selection the actual hyperlink components need to accompany the .nav-link class designated to them. One of the web links-- generally the initial should additionally have the class .active due to the fact that it will certainly work with the tab being presently open as soon as the web page gets stuffed. The urls likewise need to be appointed the data-toggle = “tab” attribute and each one should certainly focus on the proper tab section you would want to have shown with its own ID-- for instance href = “#MyPanel-ID”
What's new inside the Bootstrap 4 system are the .nav-item and .nav-link classes. Also in the earlier version the .active class was selected to the <li> element while presently it become appointed to the hyperlink itself.
And now when the Bootstrap Tabs Dropdown structure has been certainly made it is simply time for building the sections maintaining the concrete web content to become presented. Primarily we need to have a master wrapper <div> component together with the .tab-content class appointed to it. Within this specific element a number of features having the .tab-pane class ought to be. It also is a good idea to add the class .fade in order to ensure fluent transition whenever switching between the Bootstrap Tabs Dropdown. The feature which will be shown by on a web page load really should additionally carry the .active class and in the event you go for the fading shift - .in along with the .fade class. Each .tab-panel must feature a unique ID attribute which will be applied for linking the tab links to it-- just like id = ”#MyPanel-ID” to fit the example link coming from above.
You are able to additionally set up tabbed control panels applying a button-- just like appearance for the tabs themselves. These are in addition named like pills. To execute it just ensure that as opposed to .nav-tabs you select the .nav-pills class to the .nav component and the .nav-link web links have data-toggle = “pill” instead of data-toggle = “tab” attribute.
Nav-tabs practices
$().tab
Switches on a tab element and content container. Tab should have either a data-target or an href targeting a container node within the DOM.
<ul class="nav nav-tabs" id="myTab" role="tablist">
  <li class="nav-item">
    <a class="nav-link active" data-toggle="tab" href="#home" role="tab" aria-controls="home">Home</a>
  </li>
  <li class="nav-item">
    <a class="nav-link" data-toggle="tab" href="#profile" role="tab" aria-controls="profile">Profile</a>
  </li>
  <li class="nav-item">
    <a class="nav-link" data-toggle="tab" href="#messages" role="tab" aria-controls="messages">Messages</a>
  </li>
  <li class="nav-item">
    <a class="nav-link" data-toggle="tab" href="#settings" role="tab" aria-controls="settings">Settings</a>
  </li>
</ul>

<div class="tab-content">
  <div class="tab-pane active" id="home" role="tabpanel">...</div>
  <div class="tab-pane" id="profile" role="tabpanel">...</div>
  <div class="tab-pane" id="messages" role="tabpanel">...</div>
  <div class="tab-pane" id="settings" role="tabpanel">...</div>
</div>

<script>
  $(function ()
    $('#myTab a:last').tab('show')
  )
</script>
.tab(‘show’)
Chooses the provided tab and reveals its own involved pane. Some other tab that was previously chosen ends up being unselected and its related pane is hidden. Returns to the caller before the tab pane has actually been demonstrated ( id est before the shown.bs.tab activity happens).
$('#someTab').tab('show')Occasions
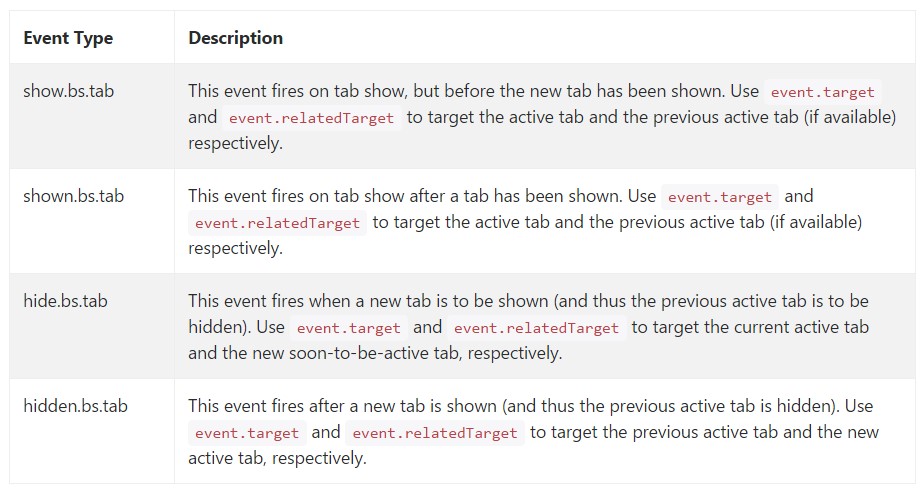
When demonstrating a new tab, the events fire in the following ordination:
1. hide.bs.tab ( on the existing active tab).
2. show.bs.tab ( on the to-be-shown tab).
3. hidden.bs.tab ( on the previous active tab, the identical one as for the hide.bs.tab event).
4. shown.bs.tab ( on the newly-active just-shown tab, the same one when it comes to the show.bs.tab event).
In the case that no tab was pretty much active, then the hide.bs.tab and hidden.bs.tab occasions will certainly not be fired.
$('a[data-toggle="tab"]').on('shown.bs.tab', function (e)
  e.target // newly activated tab
  e.relatedTarget // previous active tab
)
Conclusions
Well fundamentally that is simply the way the tabbed sections get designed using the newest Bootstrap 4 edition. A factor to pay attention for when generating them is that the various elements wrapped inside each and every tab section must be practically the similar size. This will definitely help you keep away from certain "jumpy" behavior of your webpage once it has been actually scrolled to a particular position, the site visitor has begun browsing through the tabs and at a special moment gets to open a tab together with extensively additional web content then the one being really seen right prior to it.
Look at some online video tutorials regarding Bootstrap tabs:
Connected topics:
Bootstrap Nav-tabs: authoritative records

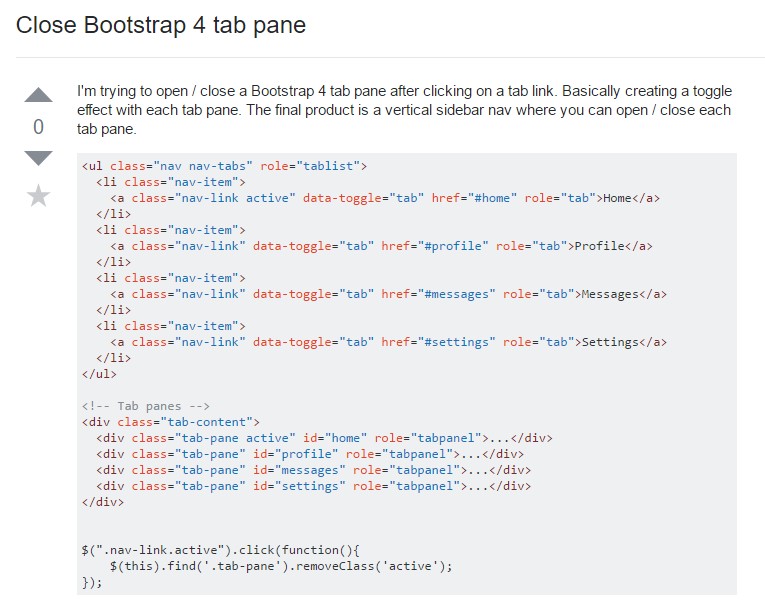
The ways to turn off Bootstrap 4 tab pane
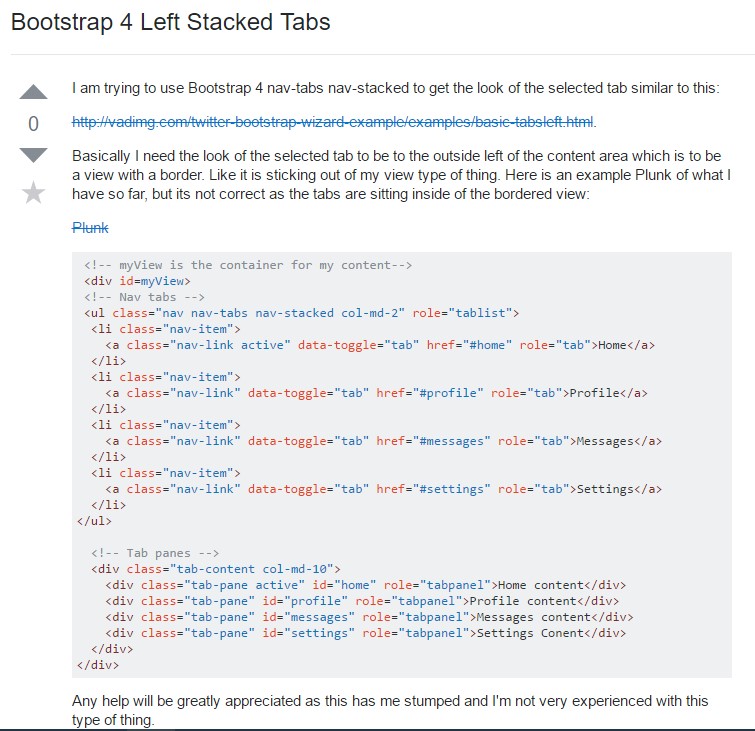
Bootstrap 4 Left Stacked Tabs